Microfilming is the process in which documents, newspapers or book pages are reduced to a very small size and copied on micro photographic film.
If you ever wondered how to do microfilming then this article will show you exactly what to do. Whether it’s microfilming of records, company documents, invoices or financial statements and even medical records, this is the best preservation method for long periods of time.
Do you have a current microfilming project in which you need help? Below you can find our contact form. Don’t hesitate to contact us.
Microfilming documents
Microfilming documents is done by following the next 5 steps:
- Prepare your source paper documents for the microfilming process. Make sure no document is missing from the batch.
- Now it’s time to structure the information, create a logical order for microfilming and generate indexes from that information.
- Write the digital files to microfilm. Each archive writer has it’s own procedure, but the process itself is quite similar.
- Process the microfilms using the appropriate chemicals. This step should reveal the information that was exposed to the film in step 3.
- Inspect the microfilm roll after the processing phase. It should be dry of water and clean of any stains or lint. If everything is ok, you have microfilmed your first roll.
The theoretical aspects of the microfilming process
As you probably know, microfilming can be done on 16mm or 35mm microfilm reels. This was the main archival method used by the archiving industry. It was only surpassed by digital archiving only in the last 5 years.
Why use microfilm
Microfilm is still used in the archiving industry because it provides the highest longevity of any document storage media. With all the technological research and development, it is still the only storage media that will resist 500 years.
- The lifespan of microfilm is over 500 years. Always check with the microfilm supplier if it meets the LE500 rating.
- It’s not prone to viruses, it’s very difficult to be forged and if stored properly, it will not be affected by environmental agents.
- The price of microfilm has gone down quite significantly. Therefore it’s a cheap solution nowadays.
- Microfilm has a standard storage capacity of about 2500 A4 documents when 30m long and over 5000 documents when 66m long.
Importance of microfilming
While we do live in a digital era, microfilming is still of big help even today. A lot of institutions have valuable documents in their archive.
Think of paper land documents. A land register deals with properties and their respective owners.
Microfilming plays a big part in securing such documents. It is an important backup that allows such an institution to have these documents in 3 separate forms, paper, digital, and microfilm.
No one wants to lose their property because an archive was destroyed or all the property files have disappeared.
Microfilming is another step in making sure that if such an event would occur, there is always a backup available.
Microfilming invoices
When you are microfilming invoices you must follow these guidelines:
- Make a strict inventory of your invoices and statements, and make sure none are missing.
- Sort them based on months, years, supplier and customer. The logical structure has to be 100% correct and it has to allow you search through them very easily.
- Make sure you don’t microfilm more than 2400 invoices on each roll. This way you can structure the information much better.
- If possible, microfilm a year or two years worth of invoices on roll, depending on the volume you have. It will be much easier to retrieve them if necessary or search for them.
- Once the microfilming is done, store the rolls appropriately and minimize any risks that might affect them.
Microfilming Invoices
How to microfilm documents
As promised, below you will learn how to microfilm documents. We will try to explain most details about each phase and what is possible. Of course, we do recommend having trained personnel doing this. While it is possible to learn the steps without a guide, we think it might be a bit harder.
Step 1 – How are documents prepared for microfilming
We can’t stress enough how important it is to prepare the documents for the microfilming process. While they might be well scanned, take into account you have to synchronize the writer with the scanner. The synchronizing means that you have to be sure images will look ok on film and also if their format will fit the size. The film is bitonal, you might have scanned in color or grayscale. Make sure you binarize appropriately.
Make sure you adapt the image processing for each of the following types of document that can be microfilmed:
- Personal documents such as land records, contracts, personal invoices, medical records
- Corporate documents – bills, microfilming invoices, contracts, patient records, written agreements etc
- Archival documents – Historical records, manuscripts, journals, political archival records
- Libraries and archives – News papers, Books, manuscripts, journals, textbooks etc.
If you want you can contact us, and we will show you free samples of how your files should look. Furthermore, make sure you have various methods to binarize. Using only one method will never be enough to cover all the documents. At our scanning department, we have seen some very badly written film. And really, it’s a shame. You are spending money writing film so it’s better you do it properly.

Processing images and indexing the microfilm rolls
So image cleaning and conversion is probably 25% of your work. Also, prepare all the documents into the digital file format the archive writer can handle.
Step 2 – Structuring the information for the microfilming process
Now that you have cleaned and binarized the images let’s get to the structure. Structure or information indexing is another major step of the process. For each roll, you will have to generate a list of what information it contains. Can you imagine manually generating such lists? It would be impossible. Especially in larger projects. Indexing of information allows you to have control over immense quantities of information.
For example, we could tell you in 1 minute, on what roll you can find a certain image. This is because prior to writing the film, we structure the information based on various criteria. Together with other stakeholders, you should decide on information logic. Then with that logic, you can start to spread it based on criteria. Consider you can write around 2500 images on a roll. After that, you should have your rolls prepared for writing.
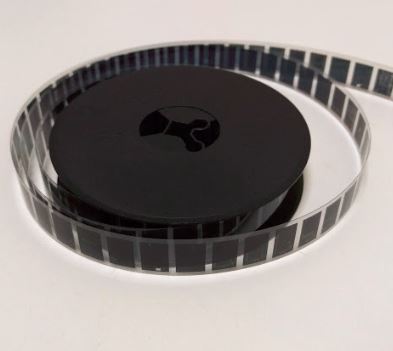
Step 3 – Writing files to microform media
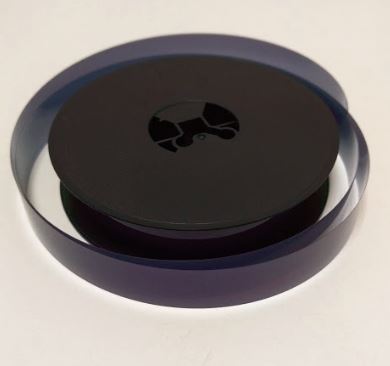
Picture of an unprocessed microfilm roll
The microfilming process continues with the actual writing part. Over here you usually insert new film into cassettes or tapes, depending on the machine. As you have read in our article about microfilm writers, these machines are exposing the film. By exposing they are actually „micro burning” the film. The film is light sensitive. What this means is that when you expose it to light it gets dark. It is identical to the photo process.
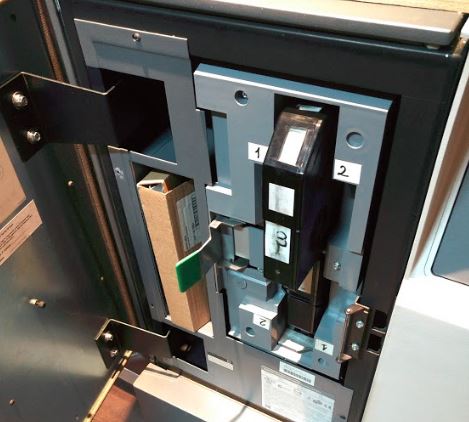
Inserting the microfilm cassette into the writer
In the case of microfilm, the machine burns the image with the pattern of the document. The led bar is generating a line that is projected through the lens. The projection always has the pattern of the image that you microfilm when the lines are stitched together.
The lens is reducing the light according to the reduction size you choose. If you want a 24x reduction, it will reduce the beam size by 24 times. We recommend a dark room for writing.
Step 4 – The processing phase
We start where we left. In the dark room. The processing phase of the microfilming process is probably the most complicated, just like in standard photography. You need a warm water supply, developer, and fixer chemicals. These chemicals, as named, do different tasks. The developer has the role of revealing the image. The fixer makes sure the image stays on the film and is not washed away.
Both of them are important and their roles are separated. For this process you really need experience. It’s a more industrial type of work. Water inlets and replenishment is not really office work. Also, this must be a dark room. Literally. You have to work in the dark, or you risk ruining rolls of film. You constantly have to monitor the temperature and check the level of both the developer and the fixer. Also, always make sure the film is not jamming in the transport.

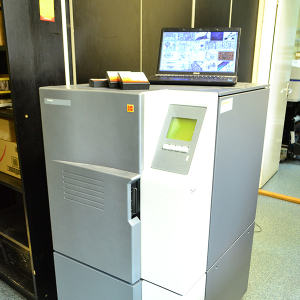
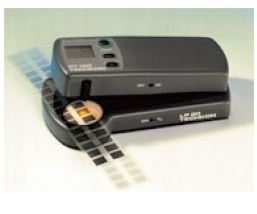
The machines we use to chemically process microfilm
Other aspects you should know about microfilm processing
The transport assemblies always have to be maintained and cleaned. The operator will eventually get to hate the processing machine. It requires constant attention and troubleshooting is always difficult. You risk jams of the film in the machine. A jam always means you have to rewrite the roll. Troubleshooting can be a bit difficult sometimes because there are so many moving parts.
We always recommend you own duplicates for racks, or if possible machines on standby. We currently own 4 processing machines, but we use them for spares and to avoid downtime. Unfortunately, without the processing phase, microfilm is impossible.
We have seen one vendor offering the film for sale with processing included. If you do insist to write your own film, we highly recommend you choose such an option. In today’s digital era, you will find it a bit of a handful. To get a better picture, just ask the vendor to show you how film processing works.
This is what a microfilm roll looks after processing
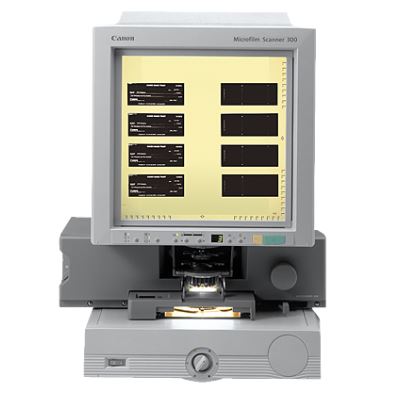
Step 5 – Microfilm inspection
Microfilm inspection is another critical step in the microfilming process. Yes, you do have to inspect the film as it is coming out of the processing machine. The first thing to look for is scratches. Scratches on film mean somewhere along the transport, some rollers are stuck or are very used. We have mainly seen rollers that are stuck. But it can happen sometimes that materials are heavily used.
Microfilming Process – Checking the density of black on microfilmed images
Then we have lint or dirt. Dirt on film is a result of many factors. Most often heavy water will spiral out of control. This means that heavy water residues will eventually keep dirt inside the machine. For this, we recommend heavy water filters. Sometimes the film might come out still wet. This will make the film sticky and ruin its quality. This usually means a problem in the drying phase, either not warm enough or carrier issues.
Is microfilm obsolete or should you still consider it
Lately, we have seen that microfilming has been overtaken by digital storage media. This is to be expected as digital media offers higher retrieval speed and easier access to information.
Still, microfilming can work hand in hand with digital. We don’t see digital as a replacement to microfilm, rather we see microfilming as a backup alternative.
The cost to microfilm records has gone down significantly. Having a microfilm backup for your digital documents is a great way to have maximum security and severely minimize any risks related to your documents.
Therefore, think of microfilming as the ultimate back up solution, especially when your records are of critical importance. And with microfilming services costing less and less, it’s much cheaper than in the past.
The verdict is that microfilm is not obsolete, and it still has its use cases where it outperforms any digital storage media.


